

Published Jul 01, 2024 • 4 min read
An Elasticsearch index is a logical namespace used to organize and store data in the form of JSON documents. Think of it as a collection of data that shares common characteristics or belongs to the same category within your Elasticsearch cluster. Each index maps to one or more physical shards—the basic unit of scalability and performance in Elasticsearch.
Indexes in Elasticsearch allow you to efficiently store, search, and analyze a wide variety of data types. When creating an index, you define its settings, mappings, and optionally, aliases.
For businesses looking for IT software solutions to handle large datasets, Elasticsearch integration provides a scalable and robust platform for data management. This flexibility makes Elasticsearch a preferred choice for businesses in need of IT solution services that ensure efficiency and precision.
When setting up Elasticsearch, you have two main options: a self-managed deployment or leveraging Elastic Cloud. In this tutorial, we’ll focus on the Elastic Cloud setup, walking you through the steps to integrate Elasticsearch with your Node.js application seamlessly.
Elastic Cloud simplifies the deployment and management process, making it ideal for businesses seeking IT solutions support without the overhead of managing infrastructure. Whether you’re a seasoned developer or new to Elasticsearch, this step-by-step guide will streamline your Elasticsearch integration journey.
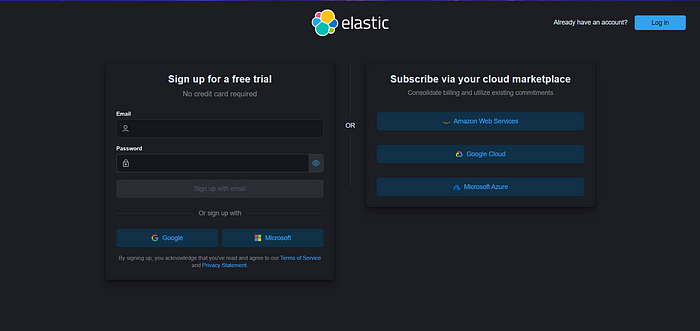
To get started, create a new Elastic Cloud account or log in to an existing one.
After successful login, create and configure a new deployment. Copy the resulting deployment credentials which will be used in the future.
Before starting, ensure you have node.js installed together with NPM.
Create a new directory for our project and run following commands in the terminal
npm init -y
npm install express body-parser dotenv @elastic/elasticsearch
Installed dependencies are as follows:
Create a .elastic.env file and paste the deployment credentials along with Cloud ID, which can be found in deployments and selecting your deployment.
CLOUD_ID="your-cloudid"
ELASTIC_USERNAME="your-username"
ELASTIC_PASSWORD="your-password"
Create a elasticClient.js file where we’ll initialize our elasticsearch client. Add following code in it.
const { Client } = require("@elastic/elasticsearch");

require("dotenv").config({ path: ".elastic.env" });

const elasticClient = new Client({
  cloud: {
    id: process.env.ELASTIC_CLOUD_ID,
  },
  auth: {
    username: process.env.ELASTIC_USERNAME,
    password: process.env.ELASTIC_PASSWORD,
  },
});

module.exports = elasticClient;
The initiated client will be used to connect to our cloud and operate on it.
Now, create a postIndex.js file in which a new posts index for storing post data is created:
const elasticClient = require("./elastic-client");

const createIndex = async (indexName) => {
  await elasticClient.indices.create({ index: indexName
};

createIndex("posts");
Run, node postIndex.js which will initiate the index.
We will start by creating app.js where we’ll initialize our express application:
const express = require("express");
const bodyParser = require("body-parser");
const elasticClient = require("./elastic-client");

const app = express();

app.use(bodyParser.json());

# Routes for our application

app.listen(8080);
We’ll add the following routes to our file. These routes will act as a proxy to our elasticsearch REST API.
# Route to our homepage

app.get("/", (req, res) => {
  res.redirect("http://localhost:3000/");
});

# Route to create our post

app.post("/create-post", async (req, res) => {
  const result = await elasticClient.index({
    index: "posts",
    document: {
      title: req.body.title,
      author: req.body.author,
      content: req.body.content,
    },
  });

  res.send(result);
});

# Route to delete our post

app.delete("/remove-post", async (req, res) => {
  const result = await elasticClient.delete({
    index: "posts",
    id: req.query.id,
  });

  res.json(result);
});

# Route to search our post

app.get("/search", async (req, res) => {
  const result = await elasticClient.search({
    index: "posts",
    query: { fuzzy: { title: req.query.query } },
  });

  res.json(result);
});

# Route to get our posts

app.get("/posts", async (req, res) => {
  const result = await elasticClient.search({
    index: "posts",
    query: { match_all: {} },
  });

  res.send(result);
});
We have used index(), delete() and search() methods given to us by elasticsearch client.
Write following command to start your node application.
node app.js
Our node application listens on port 8080. You can create your frontend using React, Angular, Vue or any other front-end framework and make call on localhost:8080 to work with our application.
In conclusion, Techlusion stands as a trusted partner in implementing Elasticsearch with Node.js, leveraging our expertise to guide companies through every stage of the implementation process. With a focus on tailored solutions and deep understanding of Elasticsearch and Node.js, we collaborate closely with clients to align technology with business objectives, whether it’s building real-time search engines, optimizing log management, or enhancing content discovery. Our commitment to continuous learning and innovation ensures that we deliver cutting-edge solutions that are scalable, efficient, and future-proof.

Other interesting read : Unveiling the Power of Elasticsearch with Node.js: A Comprehensive Guide Pt. 1